Connect Gladly AI to an external MCP server so it can call that server's tools during Customer conversations. This article covers adding and testing a connection, then using its tools in a Guide. To learn how MCP connections work, see What are MCP connections?
MCP tools reach Gladly AI only after you add them to a Guide or Skill.
Replies that use MCP tool data pass the same reply guardrails as any other Gladly AI reply.
Before you begin
Have the following ready for the MCP server you want to connect:
The server URL, for example
https://api.example.com/mcpThe type of authentication the server uses: none, bearer token, API key, or OAuth (authorization code or client credentials)
The credentials for that authentication type
Access MCP settings
Go to Settings.
Under App Developer Tools, select MCP.
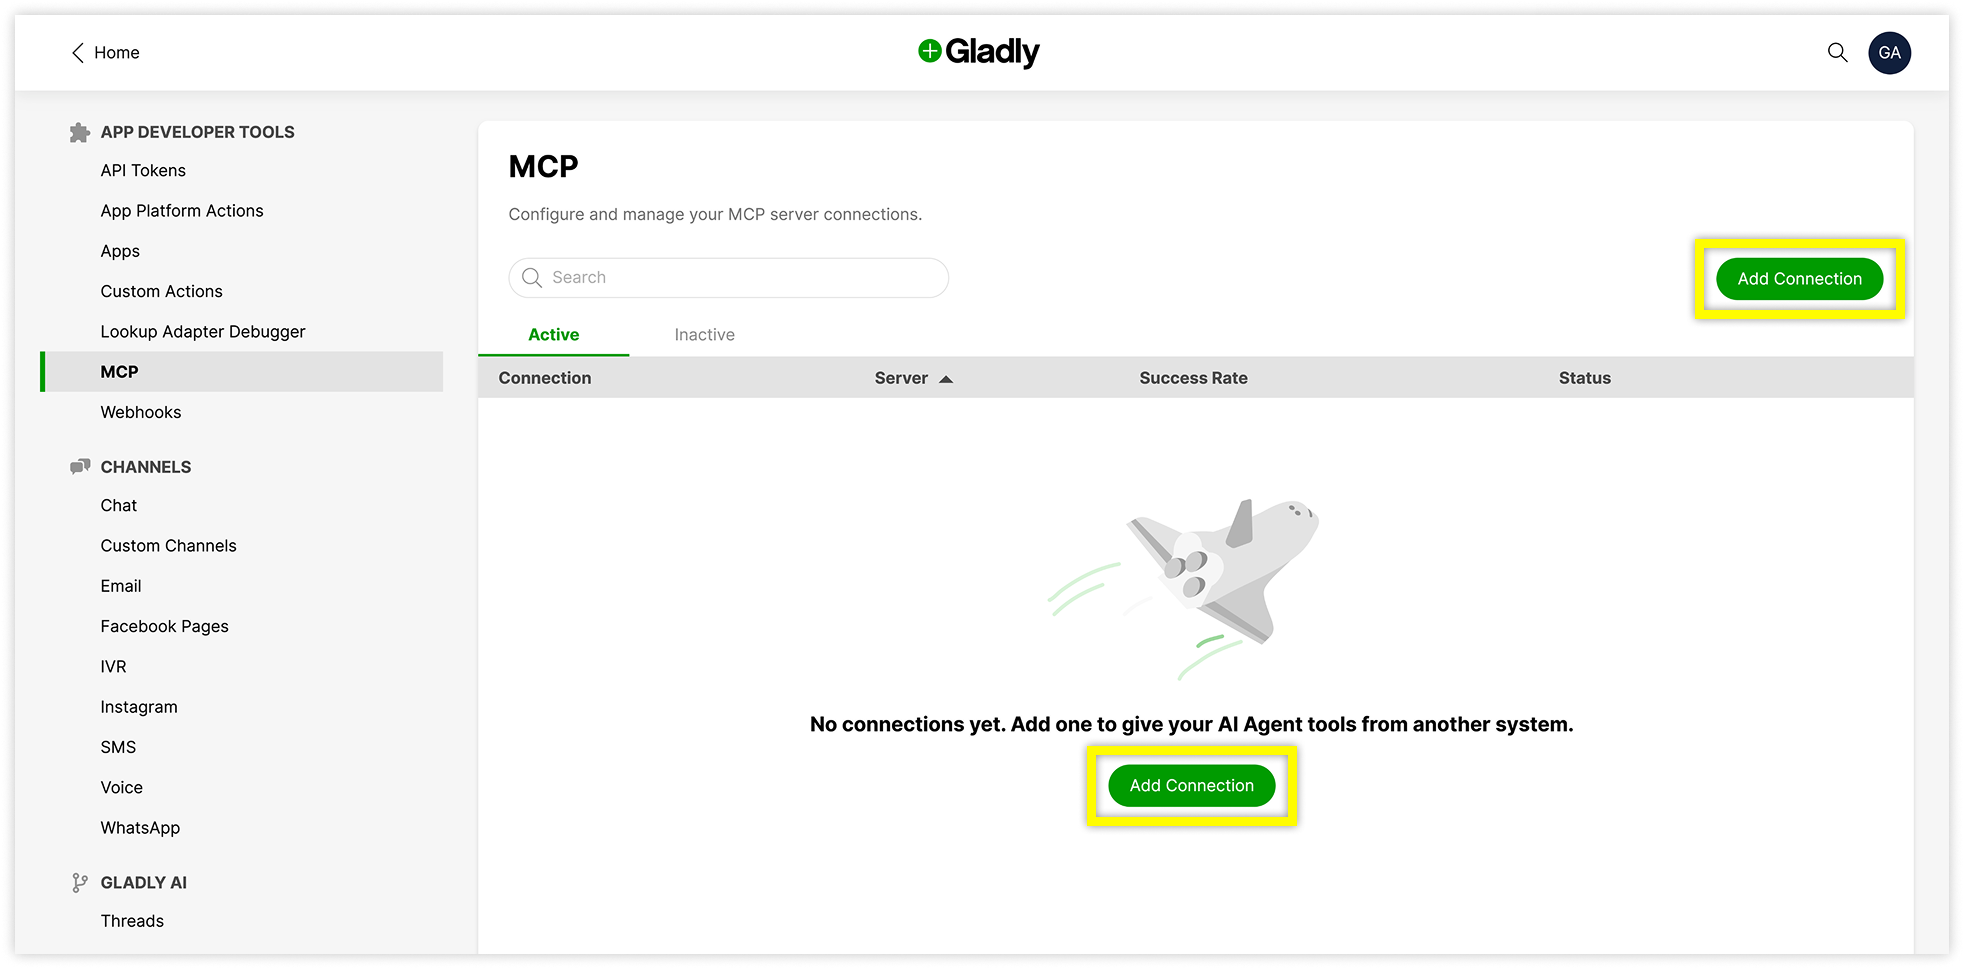
The MCP page lists your connections on the Active and Inactive tabs. For each connection, the table shows the connection name, the server, its success rate, and its status.
MCP page with no connections configured.
If you haven't added a connection yet, the page prompts you to add one.
Add a connection to a new MCP server
On the MCP page, select Add Connection.
Select the Server dropdown, then select + New MCP server.
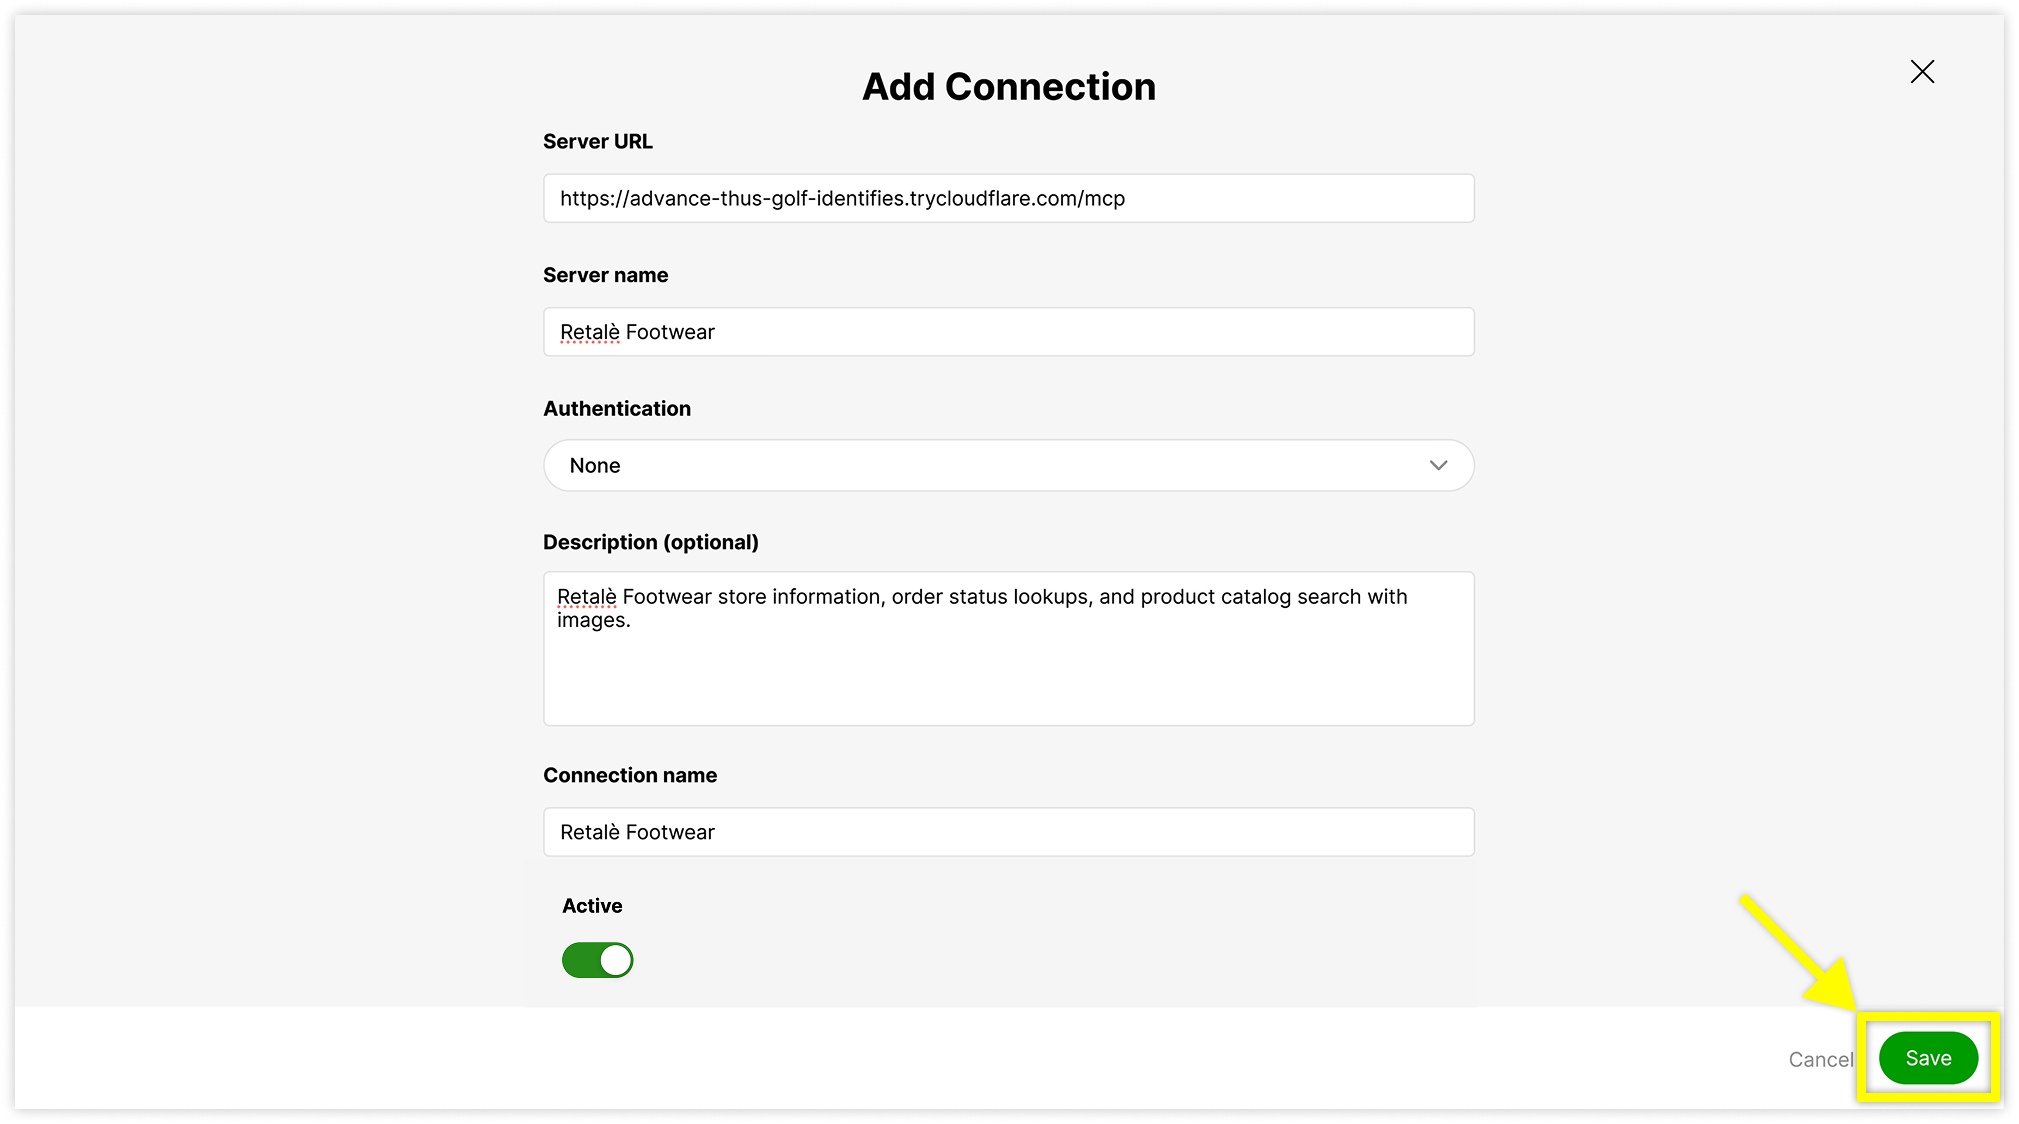
Enter the Server URL.
Enter a Server name that helps your team recognize the server, for example "Retalè Footwear".
Select an Authentication type:
None
Bearer Token
API Key
OAuth (Authorization Code)
OAuth (Client Credentials)
Enter the credentials for the authentication type you selected. For OAuth (Authorization Code), a sign-in window opens so you can authorize the connection.
(Optional) Enter a Description, for example "Store information, order status lookups, and product catalog search".
Enter a Connection name, for example "retale-footwear".
Keep Active turned on if you want the connection available right away.
Select Save.
When the connection is saved, the Connection Added page confirms that the connection is saved. Select Test Tools to try one of the server's tools right away, or select Done to return to the MCP page.
Add another connection to an existing server
If your org already has a server registered, you can create another connection to it, for example to use different credentials.
On the MCP page, select Add Connection.
Select the Server dropdown and choose a server under Your servers. You can search by name or URL.
Enter a Connection name.
Keep Active turned on if you want the connection available right away.
Select Save.
Test the MCP
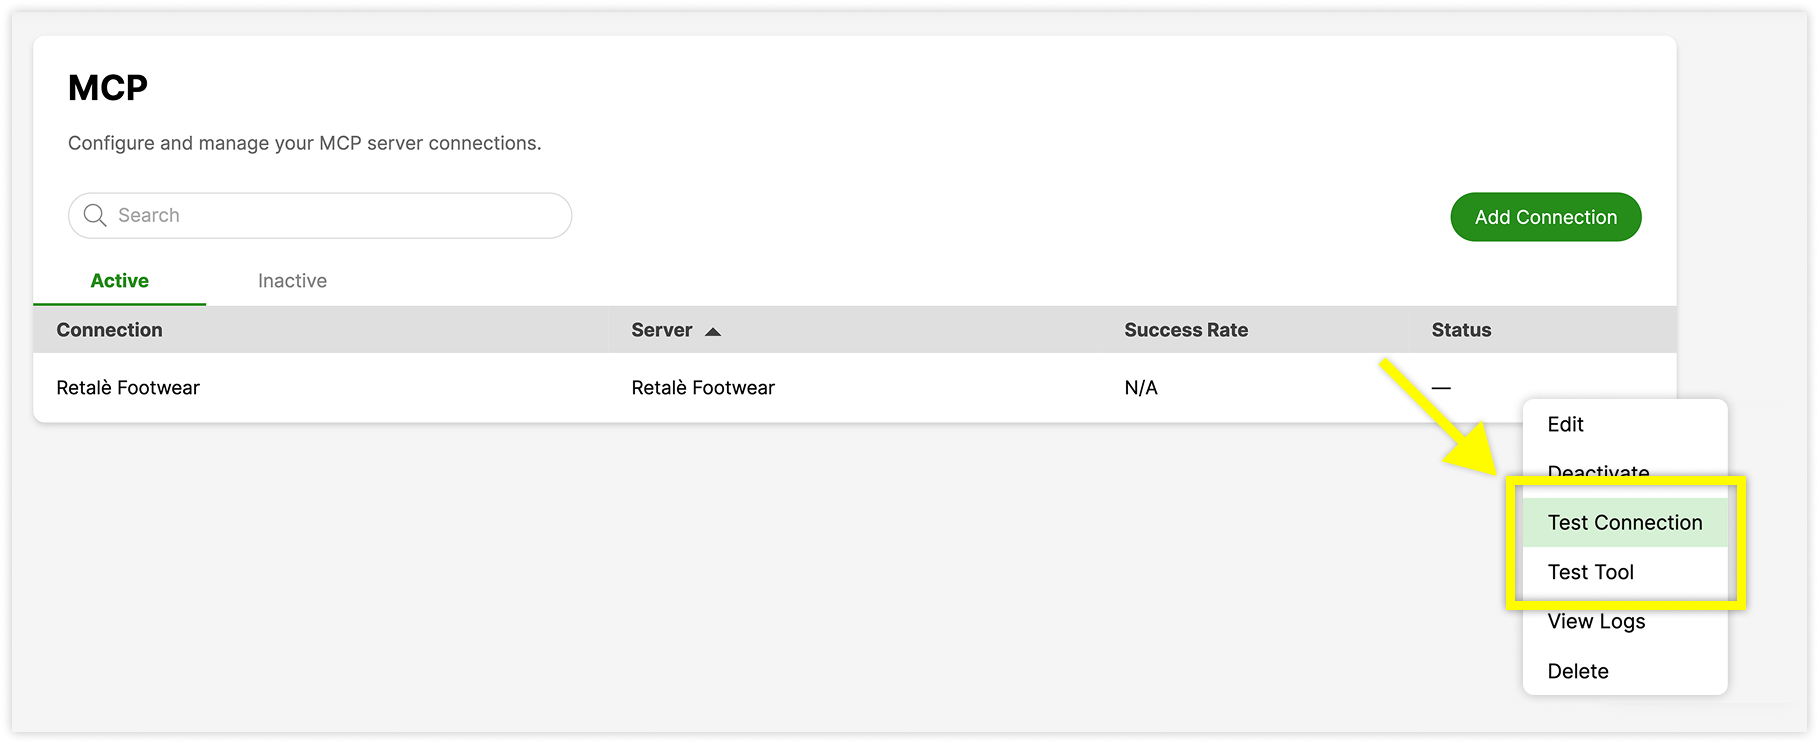
You have two test options: Test Connection checks that Gladly can reach the server and find its tools, and Test Tool runs one tool so you can review its output.
What is a tool?
In MCP, a tool is a single action an external server lets Gladly AI run, such as looking up an order or searching a product catalog. Each tool has a name, a description, and the inputs it needs, and it returns a result that Gladly AI can use in its reply. One MCP server can offer many tools, and Gladly discovers them automatically when you add a connection.
Examples from a footwear store’s server:
lookup_order_status: takes an order number and returns the order’s status and tracking details.
search_products: takes a search phrase, such as “loafers”, and returns matching products with prices and sizes.
get_store_hours: takes no inputs and returns the store’s hours.
Test a connection
Test a connection to confirm that Gladly can reach the server and discover its tools.
On the MCP page, select the menu at the end of the connection's row.
Select Test Connection.
A confirmation banner appears with the number of tools Gladly found on the server, for example "Connected - 3 tools available".
Test a tool
Run a tool on its own to see what it returns, before you add it to a Guide or Skill.
On the MCP page, select the menu at the end of the connection's row, then select Test Tool.
Select the Tool dropdown and choose the tool you want to run. You can search the list by name. Run stays unavailable until you select a tool.
Review the tool's description and the Input schema at the bottom of the page. Required fields are marked REQUIRED. Select Required only to hide optional fields, or Copy to copy the schema.
Fill in the fields. For inputs that aren't simple text, such as arrays, select Edit as JSON. If the tool takes no inputs, an Arguments (JSON) box appears with
{}in it. Leave it as is.Select Run.
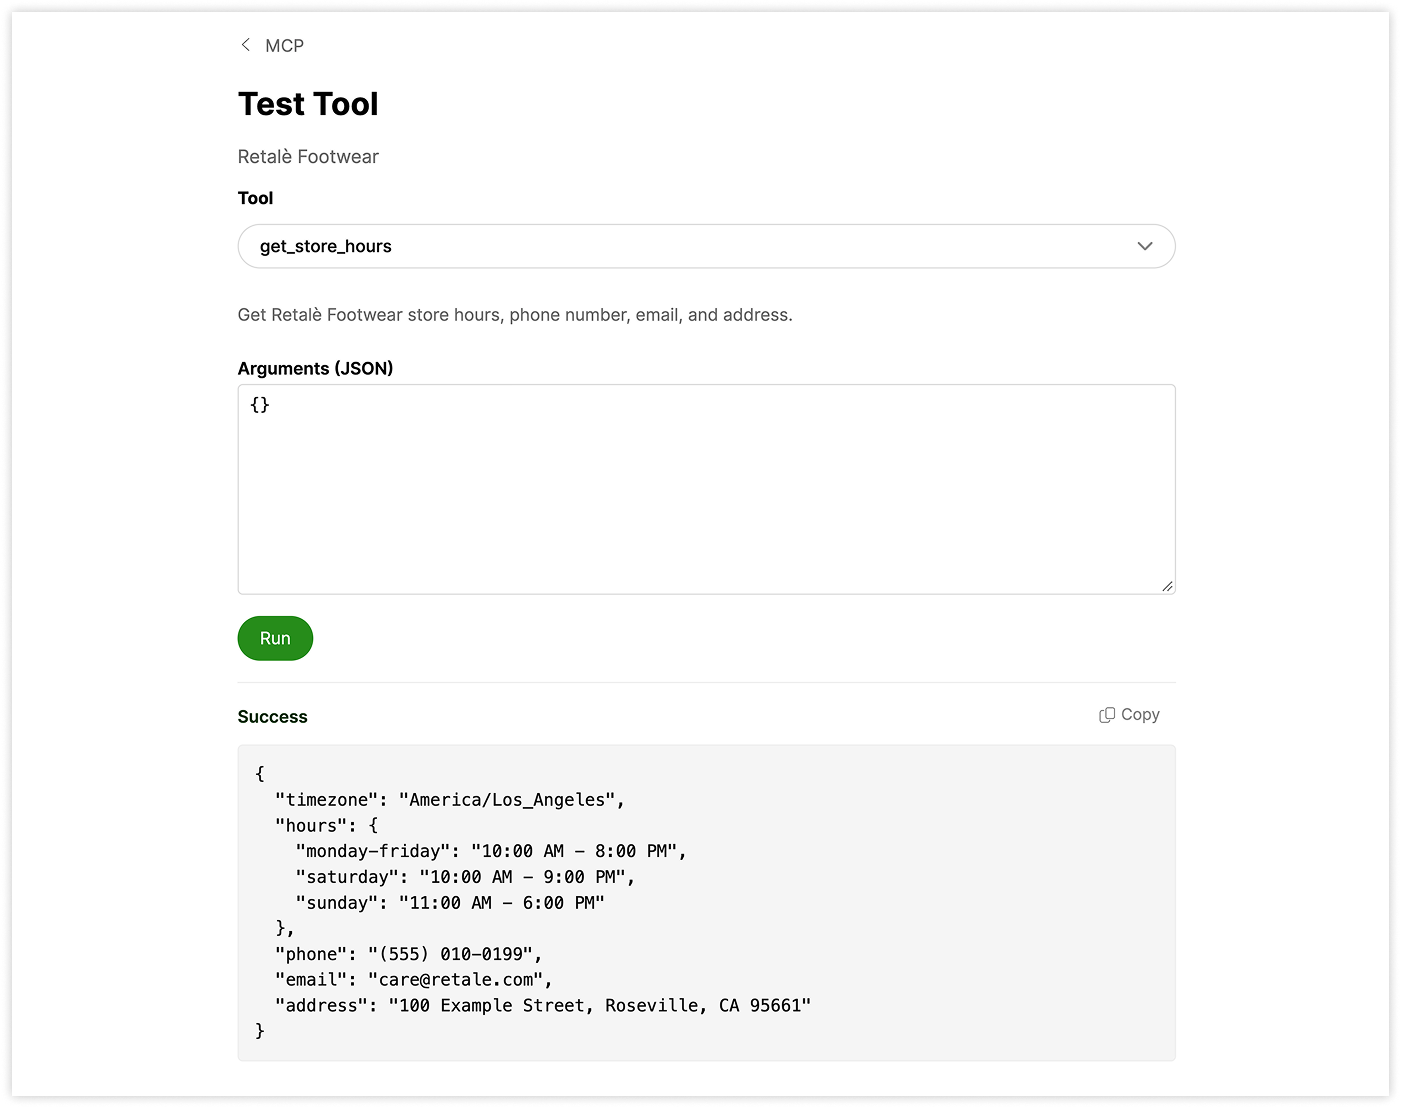
The result appears under Run, labeled Success when the call works. Select Copy to copy the result.
If you leave a required field empty, the tool call fails.
Check the Input schema to confirm which fields the tool requires.
Manage the MCP
View tool call logs
Tool call logs show each time a tool ran, including test runs.
On the MCP page, select the menu at the end of the connection's row.
Select View Logs.
Select a log entry to expand it. Each entry shows the tool name, the date and time of the call, and a green check mark if the call succeeded.
Select the Request tab to see the request URL, method, header keys, and payload. Select the Response tab to see the response information, header keys, and body. The time the call took appears at the top right.
Edit, deactivate, or delete a connection
From the menu at the end of a connection's row, you can:
Select Edit to update the connection.
Select Deactivate to take the connection offline without deleting it. Deactivated connections move to the Inactive tab.
Select Delete to remove the connection.
Use MCP tools in conversations
To make an MCP tool available to Gladly AI in a Guide, wrap the tool in a Custom Action, then add that Action to a Guide section. The Custom Action calls the MCP tool as one of its steps. The examples below use a product search tool, search_products, on a faux company MCP server.
Create a Custom Action that calls an MCP tool
Create a Custom Action
Go to Settings. Under App Developer Tools, select Custom Actions.
Select Add App Action.
.png?sv=2026-02-06&spr=https&st=2026-11-12T14%3A24%3A16Z&se=2026-11-12T14%3A41%3A16Z&sr=c&sp=r&sig=6nhShzis3sUmMJ1el16MlpJpM58PgWWvLQcX1NC%2Bodw%3D)
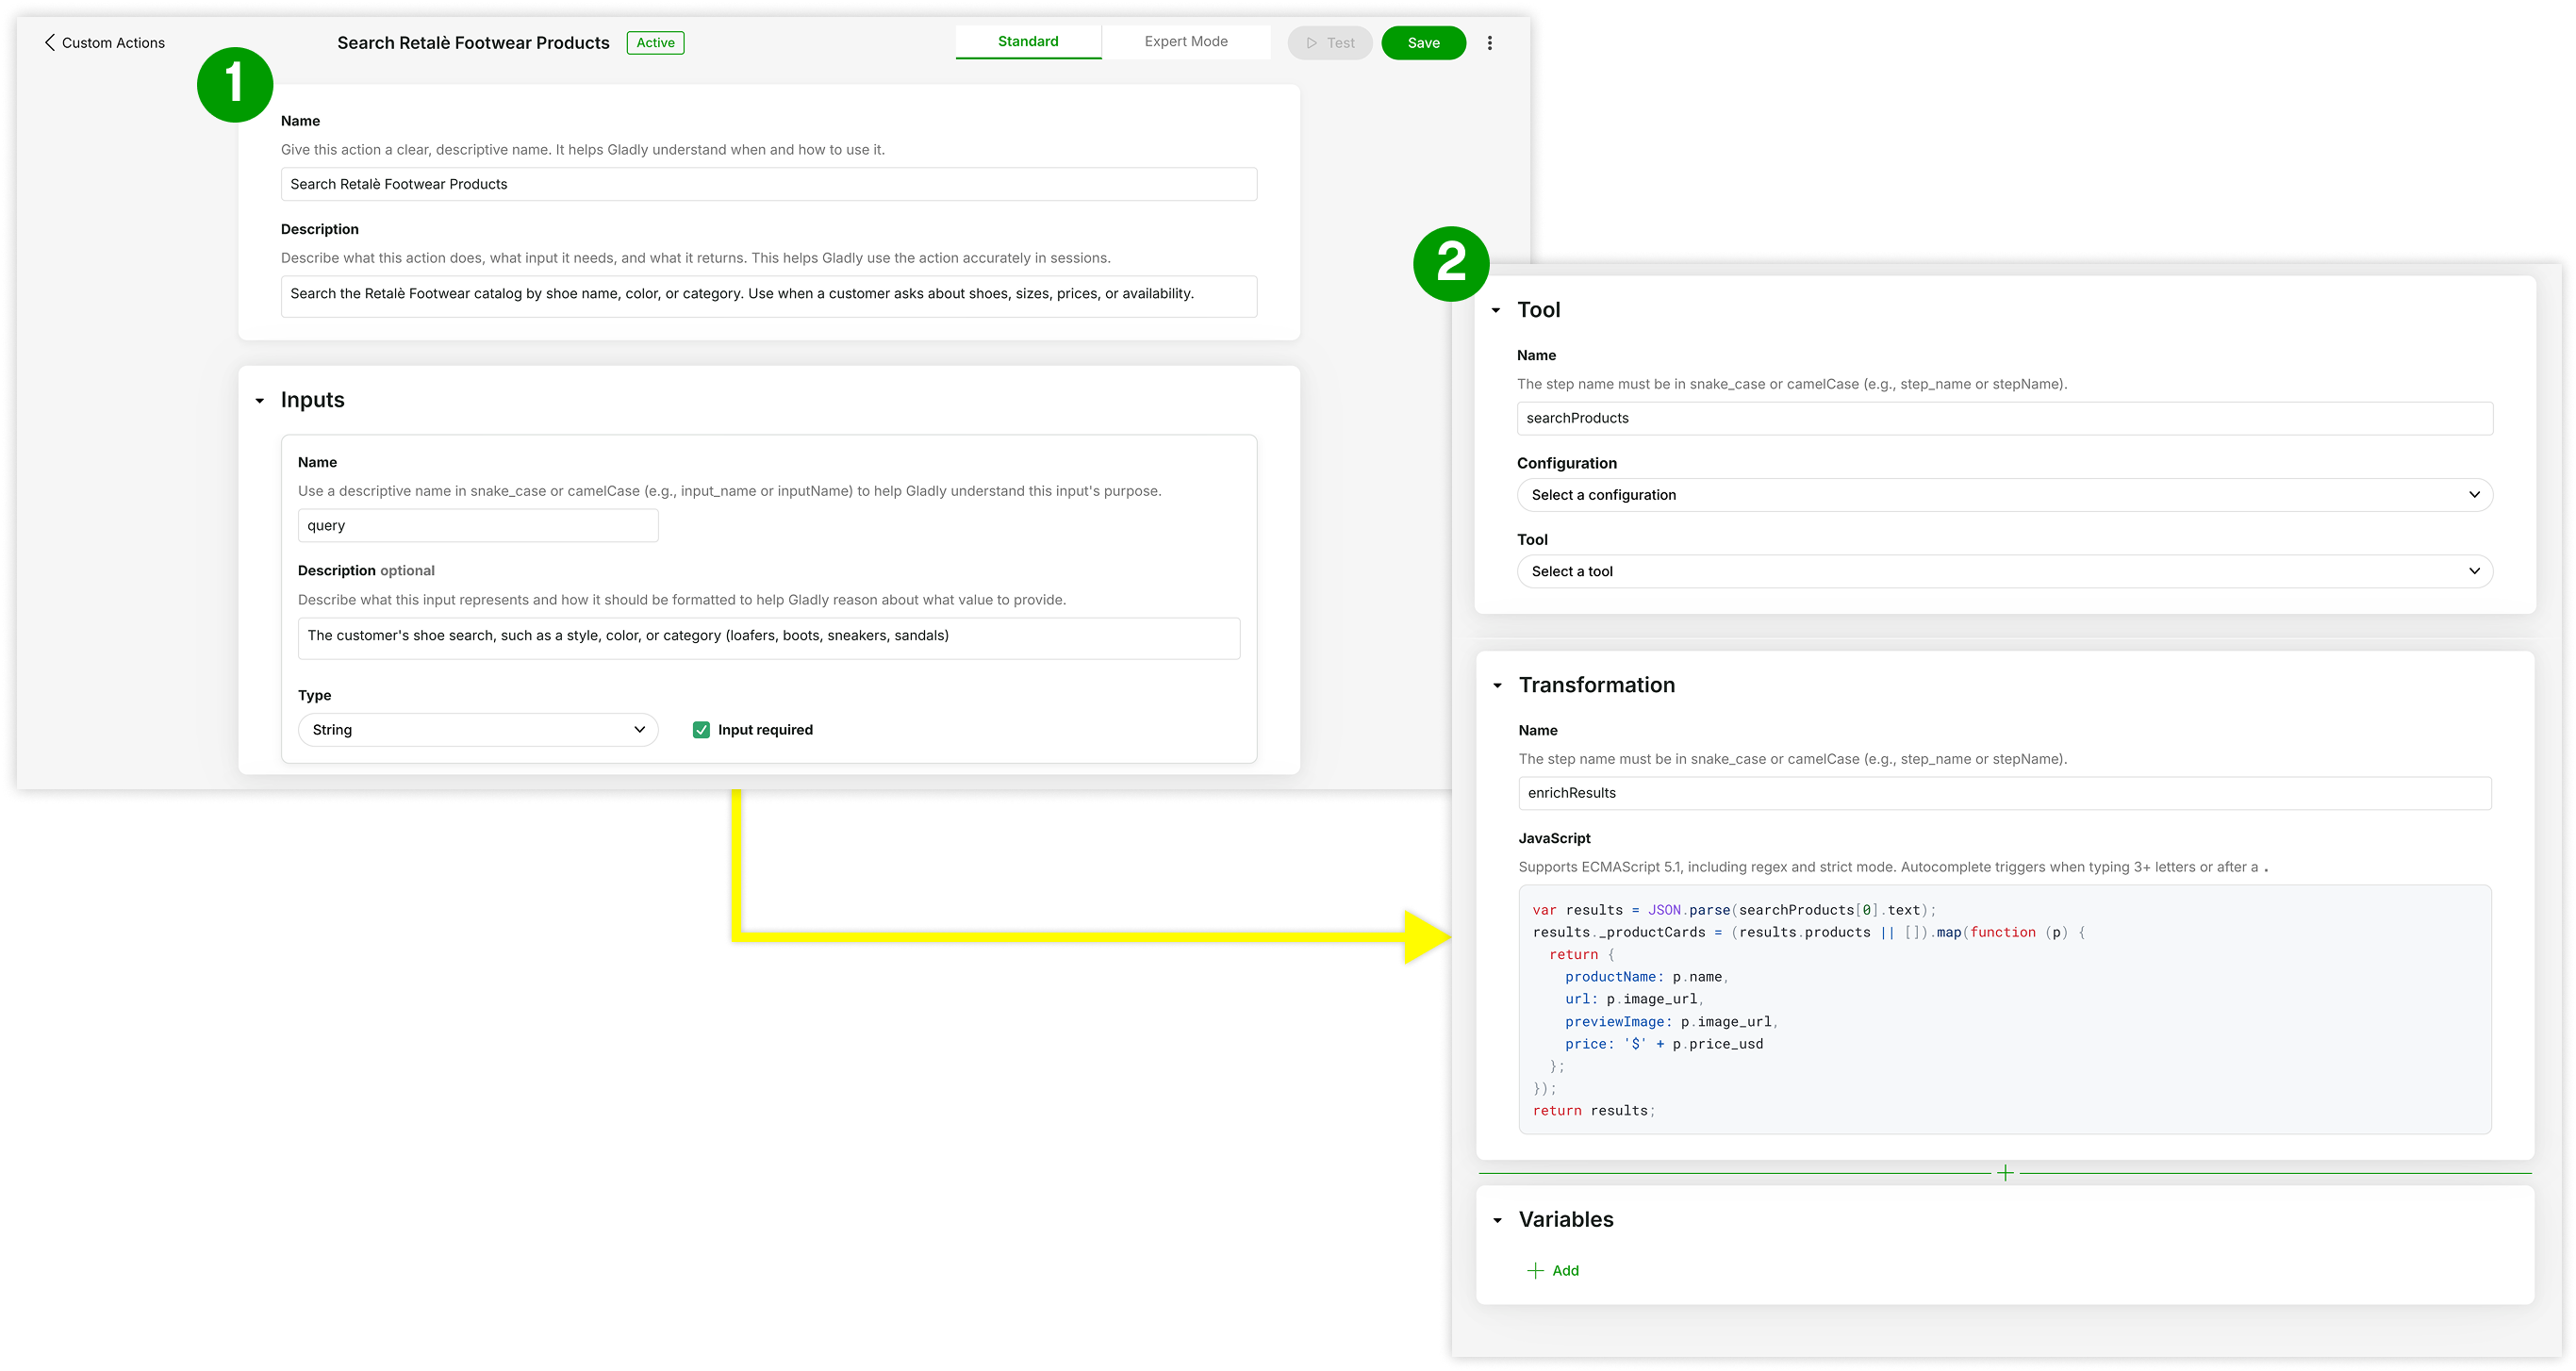
Enter a Name and a Description. Gladly uses these to decide when to run the Action, so describe what the Action does, what input it needs, and what it returns.
Under Inputs, select Add and enter the information Gladly AI needs to collect from the customer:
Name: A descriptive name in snake_case or camelCase, for example
query.Description: What the input represents and how it should be formatted, for example "The customer's shoe search, such as a style, color, or category (loafers, boots, sneakers, sandals)".
Type: Select the data type, for example String.
Input required: Select this if the Action can't run without the input.
Add (+ icon) and configure a Tool step:
Name: A name for the step in snake_case or camelCase, for example
searchProducts.Configuration: Select your MCP connection.
Tool: Select the MCP tool to run. The tool's description appears below the dropdown.
Required Parameters: Map each tool parameter to an Action input by entering
$.params.followed by the input name. For example, enter$.params.queryfor thequeryparameter.
Select Save. New Actions are saved as Inactive.
Test the Action
In the Action editor, select Test.
In the Test inputs window, optionally imitate a customer, set the Channel Type, set Is Authenticated, and enter a Gladly Agent ID or Conversation ID.
Enter a value for each Action input, for example "boots" for
query.Select Test.
Set the Action to active
An Action must be active before you can use it in a Guide.
On the Custom Actions page, select the Inactive tab.
Select the menu at the end of the Action's row, then select Set to active.
In the Set as active window, select Set as active. Any recent changes are saved and become available in Guides and App Actions.
From the same menu, you can select Edit, View logs, or Duplicate.
Apply the Action to a Guide
Add the Custom Action to a Guide
Open your AI Agent, then select Add Guide, or open an existing Guide.
Enter a name and a short description for the Guide.
In a section, enter a heading and a description of when to use it, for example "Use this when a customer asks about shoes, styles, colors, sizes, prices, or availability."
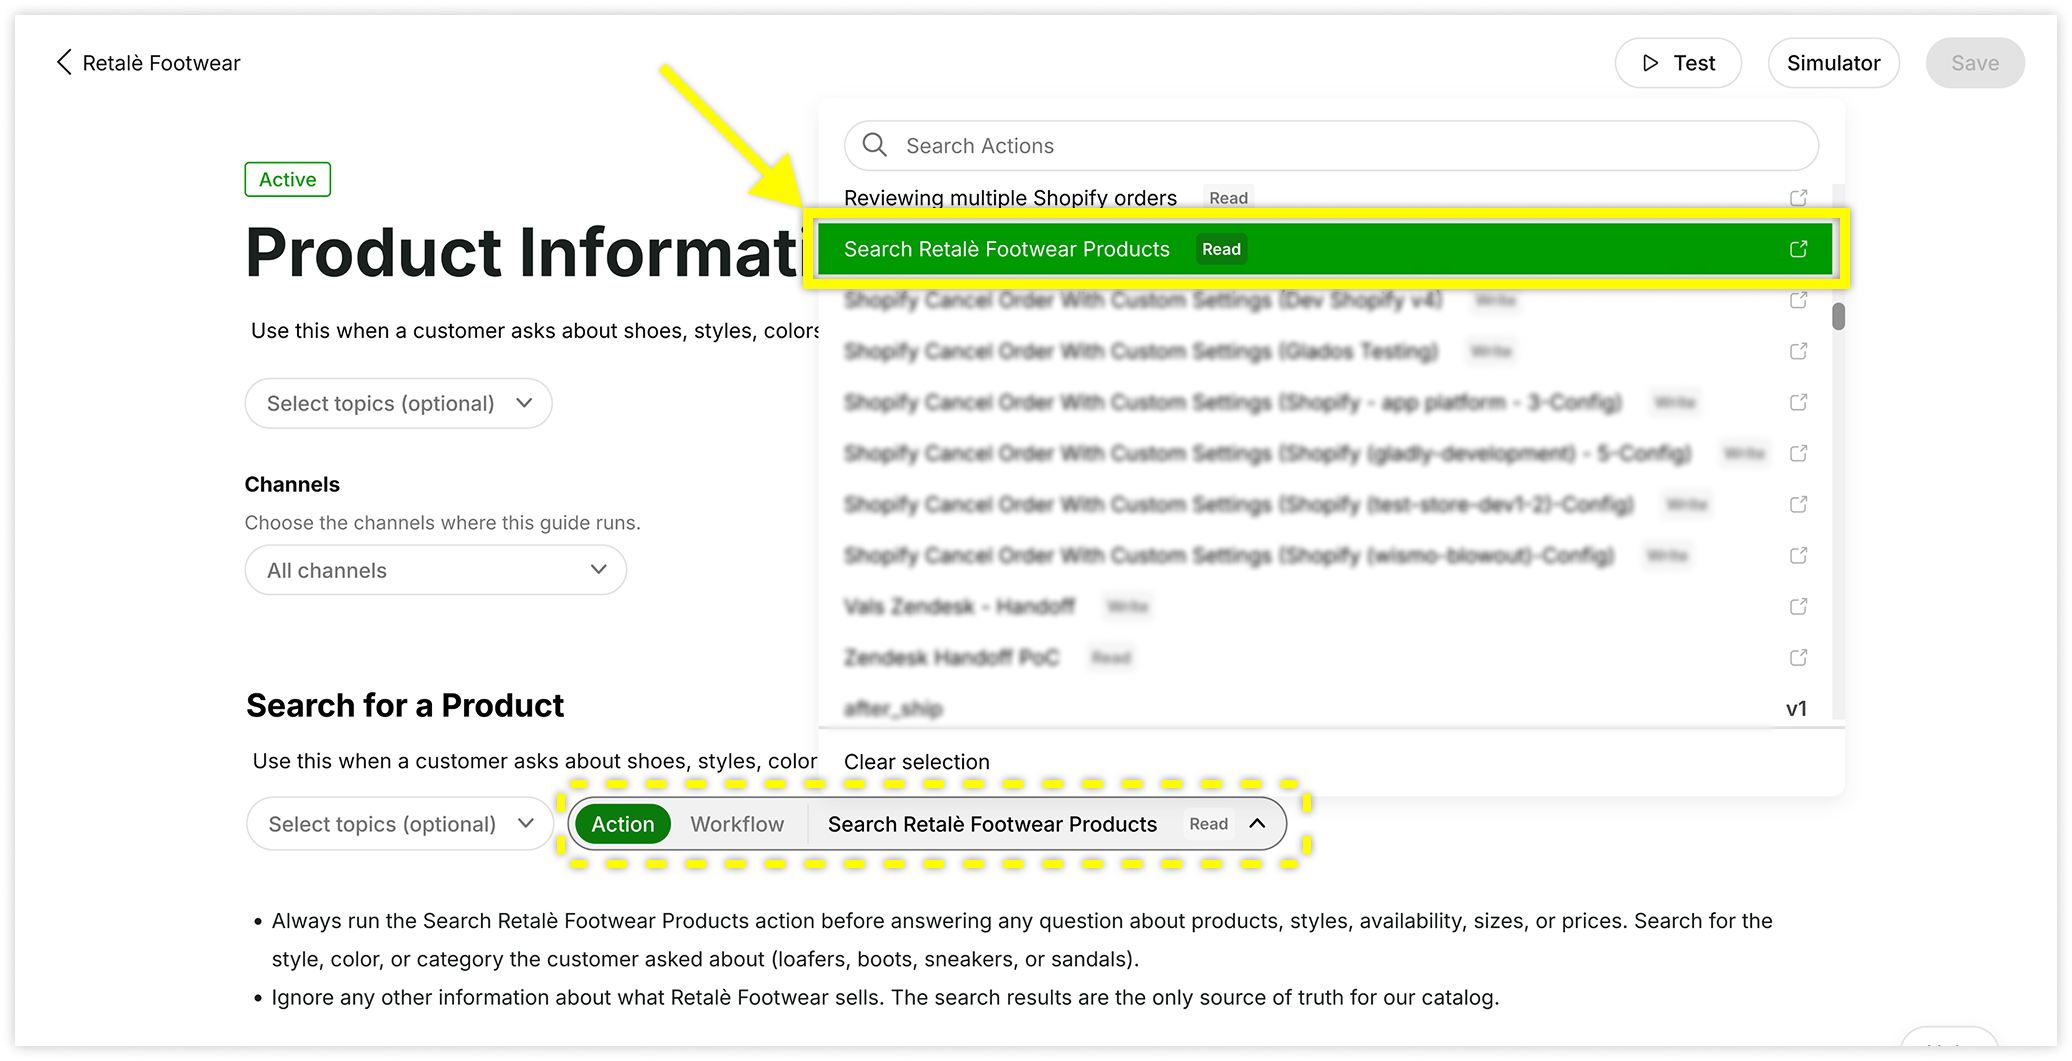
Keep Action selected, then select the Select Action dropdown. You can search by name.
Select your Action. It appears in the list with a Read tag.
In Tell Gladly what to do and where to go next, enter the steps Gladly AI should follow. Tell Gladly AI to always run the Action first, and tell it which results to share.
Select Save and make sure the Guide is Active.
Test the Guide in Chat
In the Guide, select Test.
Select the Chat channel.
Send a message that matches the section, for example "Do you have loafers?"
Gladly AI runs the Action, the Action calls the MCP tool, and Gladly AI replies with the data the tool returned. If you added product cards, they appear above the reply. To confirm the call happened, open View Logs for the connection on the MCP page.
Troubleshoot a Guide that doesn't call the Action
If Gladly AI answers from other content instead of running the Action, check the following:
Confirm the Action is active and the Guide is saved and active.
Tell Gladly AI to always run the Action in the section instructions, as in the example above.
Review other Guides and Knowledge sources that describe the same topic. Conflicting content can take priority over the Guide. Deactivate or update it, then test again.
Use MCP tools with other Actions
A single Guide can use MCP tools and other Actions together. For example, one section can search products with an MCP tool, and another can check an order with an App Platform Action. For more on how MCP connections behave, including what happens when a server is unreachable, see What are MCP connections?