| REQUIRED USER ROLE Administrator |
Create a Glad App to embed on your website and allow visitors to chat with your Agents. You can also encourage self-service by activating Quick Actions on Glad App, surfacing your most frequently asked questions, and allowing visitors to search your Public Answers.
Before you start #
Before you create Glad App, we recommend you first review the following:
- Get to know what Glad App is.
- You can create multiple Glad Apps to embed on different websites or web pages where you want your Customers to access your FAQs or your chat feature.
- Use Display Rules in the Configuration section to control where Glad App appears on websites/pages.
- The minimized style of the Glad App icon is customizable
 if you choose not to use the UI defaults.
 - If Glad App is used with Proactive Chat, note that a Proactive Chat Campaign can override the Glad App Display Rules, so Proactive Chat Campaigns may appear on webpages Glad App is not supposed to.
- Look into using Quick Reply if you want to give Customers specific options — by way of buttons — to select what they need help with.
Watch Out – We recommend not adding an Entry Point(s) until you’re ready to receive incoming requests
Upon adding a new Entry Point, incoming requests from that Entry Point automatically route to the corresponding Channel’s primary Inbox. For example, upon adding Instagram Messaging as an Entry Point, direct messages from your Instagram account will automatically create a Conversation in Instagram Channel’s default inbox.
- Voice/SMS – Phone numbers can be purchased and held onto until you’re ready to complete the setup by connecting them as Entry Points.
- Chat (Glad App) – Upon configuring Glad App, it’s available to receive incoming chat requests as soon as it’s embedded on your website. Chats are routed to the Chat Channel’s default Inbox.
- Social Channels – Upon adding a social Channel Entry Point (e.g., , Instagram, or WhatsApp), messages automatically route to the social Channel’s default Inbox.
- Email – Once an email address is added, it’s ready to receive inbound emails in the email Channels’ default Inbox as long as email forwarding is activated.
Use Exceptions to link an Entry Point to a different Inbox if you don’t want to use the Channel’s default Inbox.
Create Glad App for web #
- Click on the top left corner of the screen.
- Click Settings.
- Under the Channels category, click Glad App. The Glad App page will show you a list of Glad Apps you currently have. Under the Channels category, click Glad App. The Glad App page will show you a list of Glad Apps you currently have.
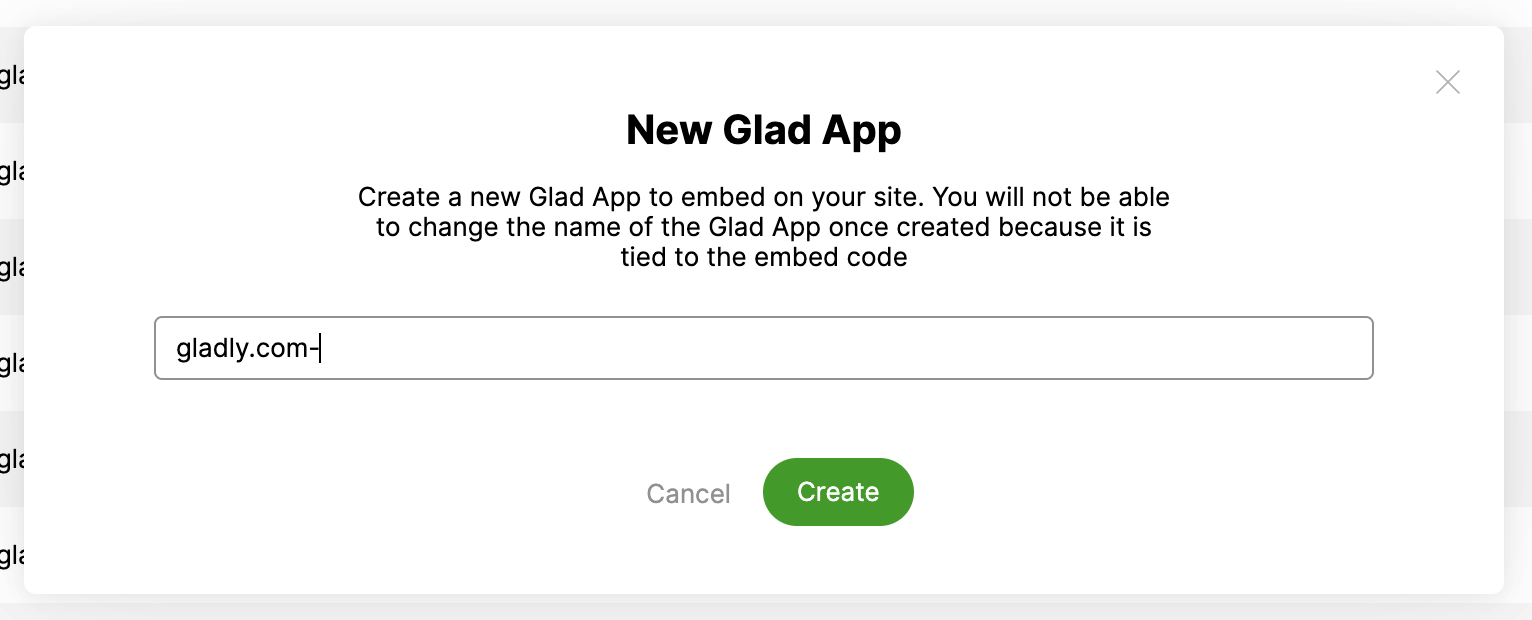
- Click Create Glad App.
- From the New Glad App prompt, enter the name of your new Glad App. You’ll see <domainname.com-> prepended. Enter the name of your new Glad App after the “–.” The name you use should help you identify how or where the Glad App is being used.
- Special characters are not supported, and space between characters is not permitted.
- The same name identifies the Glad App on the Entry Points page.
- Click Create. This will immediately take you to the configuration page.
Configure and style Glad App #
The Glad App configuration page is where you’ll set how Glad App looks and how it behaves.
Tip – Use the UI illustrations
Use the visual illustrations to the right of each option to help you visualize the part of Glad App you are configuring.
There are three sections that you will need to configure. Each section controls a particular aspect of Glad App:
- Configuration – Administrative actions such as when to display Glad App, what Quick Actions will be used, office hours to control the Availability of Glad App during business hours, and others.
- Style – Configure the look and feel of Glad App, where you can change things like border style, radius, color, and other design elements.
- Text – Customize the text on Glad App, including the header, input buttons, and more.
Configuration #
Self-Service #
- Enable Glad App for 3rd Party Automation Services – If checked, this allows third-party automation partners to create automation flows in Glad App and initially send chat requests to an automation partner instead of an Inbox. If activating, click Yes, proceed on the confirmation modal.
- Note – The third-party automation provider is responsible for coordinating the handoff to Gladly using the Automation API if their automation cannot solve an issue. Unless you’re working with an automation partner, leave this box unchecked.
- Enable Search and Quick Actions – If checked, Customers can search Public Answers, view Quick Actions, and see your Chat option. If the box is unchecked, Customers can only chat during operating hours or if the day is not marked as Closed in the Office Hours settings. Otherwise, Customers will see the Office Hours & Throttle Message text.
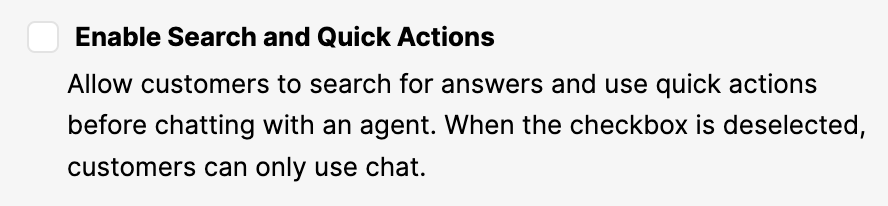
- Note – This box must be checked to allow the use of Audiences and to select the language used to search Answers through Glad App.
Display Rules #
Option to allow Glad App to appear on all web pages or no pages.
- If Display Glad App on = All Pages, Glad App appears on all web pages unless an exception is added. It’s important to note that a Proactive Chat Campaign can override the Display Rules.
- If adding an Exception, When a page = Contains, Exact, or Regex, enter the URL parameter to match the Condition.
| Condition | Description |
| Contains | The URL can match and does not have to be the only URL. For example, the URL “/mens/sneakers” appears in the URL ” retale.com/pages/shoes/mens/sneakers” would be matched using Any. For the word “sneak,” the word “sneakers'” will be matched by also using Any. |
| Exact | The URL you’re using must match exactly. For example, the URL ” /mens/sneakers” would not match the content ” retale.com/pages/shoes/mens/sneakers” using Only because the text strings don’t precisely match. |
| Regex | Short for Regular Expression, a form of light coding that lets you match patterns in the text without specifying the entire string. This is particularly useful to distinguish URLs that can be part of other URL strings or match phrases with variable text. For example, by using Regex, “/pages*” would be matched to ” retale.com/pages/shoes/mens/sneakers,” ” retale.com/pages/shoes/womens/sneakers,” and ” retale.com/pages/shoes/kids/sneakers.” Regex matching follows Google’s re2 library. |
- If Display Glad App on = No Pages, Glad App will not appear on any webpage unless:
- A Proactive Chat Campaign is triggered, which overrides the Display Rules.
- Exceptions can still be added to display Glad App on specific web pages but hide it elsewhere.
Office Hours #
Schedule office hours of when Glad App will be live on your site. Please select the correct time zone. (Gladly Recommendation – Provide an alternate way for Customers to contact you during non-business hours.)
- Timezone – Select the timezone Glad App should follow.
- Hours – Enter the hours when Glad App will be active on your website. If you are closed on a particular day, check the Closed checkbox.
- Add Time Range – Click this option to enter different time ranges you want Glad App available. For example, if your team works from 6 AM to 6 PM, but you wish to hide Glad App from your website to stop chat requests from 12 PM to 1 PM during your team’s lunch hour, this is possible with the time range setting.
- If “Enable Search and Quick Actions” box is checked, your FAQs will remain accessible, but chat will show your “chat is unavailable” message if outside office hours.
- If “Enable Search and Quick Actions” box is not checked, and if a day is marked Closed or is outside office hours, the Office Hours & Throttle Message text will appear for Customers attempting to chat in since Agents are not working.
Quick Actions #
This section only appears if “Enable Search and Quick Actions” box is checked. Quick Actions consist of four required Actions that appear on Glad App. Think of Quick Actions like a “category” or “topic” that point to an external link or Public Answer.
- Language1 – Select the language the Help Center will use to search Public Answers.
- Audience1 – Select the audience Glad App will use to search Public Answers. Selecting “none” allows the searching of all Public Answers not linked to an Audience.
- Quick Action Configuration (Four required actions)
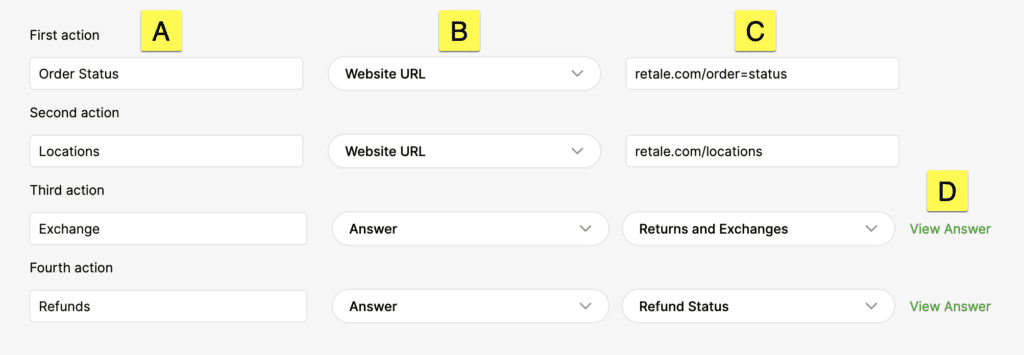
- [A] Name – Enter a name for each action.
- [B] Answer/Website URL – Select whether each action will point to a Public Answer to an external URL/webpage.
- [C] Answer or Website URL Value – Insert the value based on [B] selection. (Answer/Website URL).
- Answer – If an Answer is selected on [B], select the Public Answer from the list. Note that if an Audience is selected, only Answers linked to the selected Audience are available.
- Website URL – If Website URL is selected on [B], enter the URL of the page you want to redirect Customers to.
- [D] View Answer – If [B] shows Answer, click View Answer to view the Answer on the Answers admin page.
Icons #
Option to display an icon or button (with text) when Glad App is minimized.
- Icon – Uses an icon to display Glad App on a webpage.
- Text – Uses a button to display Glad App on a webpage. If selected, enter the text you want to show on the button.
- Note – Regardless of your selection — Icon or Text — after a Customer starts a chat or clicks on a Quick Action, the icon becomes the default state when Glad App is minimized. To override this behavior, create a custom minimized button on your website, requiring some front-end site resources for HTML & CSS styling.
- Close Button – Choose if you want the close button to be signified by an “X” or a “Dash.”
- This setting also applies to Proactive Chat. The close icon will appear when the visitor hovers over the greeting.
Style #
Placement #
Choose a left or right placement where Glad App appears on your website.
- Z-Index – Adjusts the stack order of elements (positioning of the Glad App icon on the page), which applies when Glad App is minimized. Start with “147483000” and adjust as needed.
- Powered By Gladly – Choose to allow the “Powered by Gladly” text to appear on Glad App.
- This setting is activated by default. (the box is checked)
- When clicked, the user is taken to gladly.com.
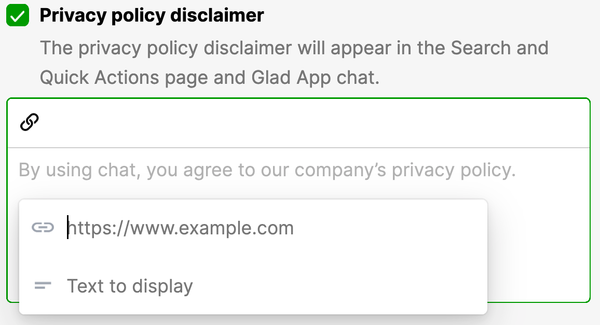
- Privacy Policy Disclaimer – Display the privacy policy statement that Customers accept when starting a chat session.
- This setting is deactivated by default (the box is not checked).
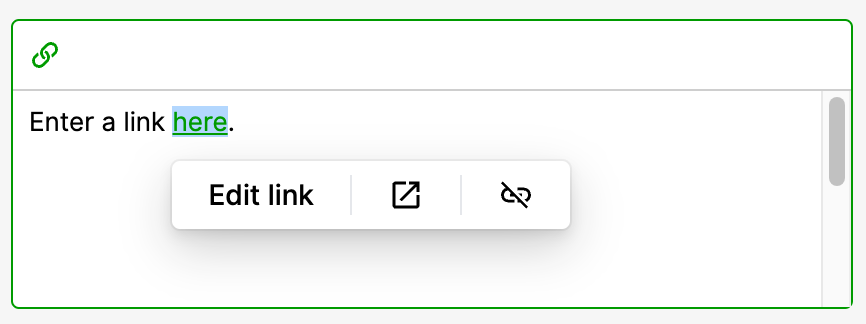
- Check the box to activate the setting and enter your Privacy Policy statement. For example, “By using chat, you accept our <company name> Privacy Policy.” Keep the disclaimer concise and within the 140-character limit.
- Link back to your company’s Privacy Policy page by highlighting the text and inserting the link.
- Drop Shadow – Choose to use (On) or not use (Off) drop shadows around Glad App.
- Border Width – Choose Glad App’s border width (1px to 3px).
- Border Color – If you have a border width selected, enter a hex color code to change the border color.
- This option is hidden if border width shows None.
- Border Radius – Choose Glad App’s border radius (none, small, large). Choosing none displays sharp border edges, including the Quick Reply buttons.
Colors #
Select the color elements of Glad App to match your company brand/style.
- Agents Chat Bubble – Enter the hex color code for the color you want to indicate the Agents’ replies.
- Consumer Chat Bubble – Enter the hex color code for the color you want to indicate your Customers’ replies.
- Help App Chat Launcher – Enter the hex color code for the color you want to indicate your Chat launcher.
- Alert Color – Enter the hex color code for the color to indicate when a live Chat is minimized and there is an unread message.
- Minimized Chat Icon Color – Enter the hex color code for the color you want to use when the icon is minimized.
- Submit Arrow Color – Enter the hex color code for the color you want for the submit arrow icon.
Text #
Glad App fonts #
- Fonts 1 and 2 – Enter the font you want to use. This should be the same font used in your website’s CSS. (e.g., Brandon Text, Avenir Next, etc.)
- Font 1 – Applied to the header text and the Chat launcher button.
- Font 2 – Applied to the Quick Actions, Quick Reply, order status, Chat bubble, and input texts.
Office Hours & Throttle Message #
Enter the message you want to display outside office hours or when Chat is unavailable. The message can be written in plain text or styled using HTML. You can also embed a web form.
Self-Service Glad App #
Configure Glad App’s self-service1 screen.
- Header – Enter the text you want to appear on the top part of Glad App.
- Back Button text – Enter the text you want to use to signify a “back” action.
- Search placeholder text – Enter a hint guiding Customres how to use search.
- Active Chat Header – Enter the header text you want to use during a live chat.
- Chat Input Button – Enter the text to use to start a chat.
- Chat Input When Button Is Unavailable – Enter a text to use when Chat is unavailable.
- Chat Input Placeholder – Enter a help text for the Chat field.
Greeting #
Configure the messages that Customers see before chatting with an Agent. (Gladly Recommendation – Consider including a text stating that emails are used for communication purposes only and not for marketing purposes.)
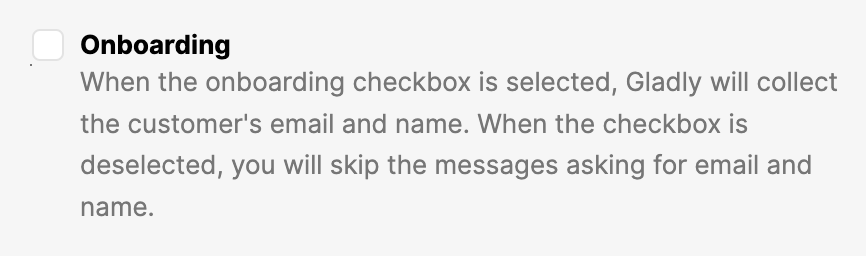
- Onboarding – If activated, you can collect the Customer’s name and email address before a chat session starts. This information is used to locate an existing Profile and any past Conversations. If not activated, Customers are not identified when starting a chat (not recommended).
- Prompt Order – If Onboarding is activated, select the order you want identifying information to be presented to Customers. (e.g., NAME > EMAIL, or EMAIL > NAME.) This information is used to identify and locate the Customer Profile (if they’re an existing Customer) or create a new Customer Profile with the name and email address.
Onboarding activated #

- First Message – Enter a greeting that also asks for their email address. For example, “Thank you for contacting us. What’s your email? We’ll use your email to find your profile and any past conversations you’ve had with us — not to spam you.”
- Getting the email address helps identify the Customer in Gladly and pull up their Profile if they are an existing Customer. Otherwise, a new Customer Profile is created.
- Second Message – Enter a message that also asks for the name. For example, “Thanks! Can we get your name?”
- This information is also passed to the Customer Profile.
- Third Message – Enter a message asking how you can help them. For example, “Thanks <CUSTOMERNAME>
! How can we help?” variableThe <CUSTOMERNAME> automatically inserts the Customer name. - If using Proactive Chat and onboarding is activated for a Campaign, the Third Message is replaced by the Campaign’s Action greeting.
- How Would You Like the Customer to Reply? – Customers can reply to the Third Message by typing a message (Type A Message) or selecting a reply by clicking buttons (Quick Reply Button).
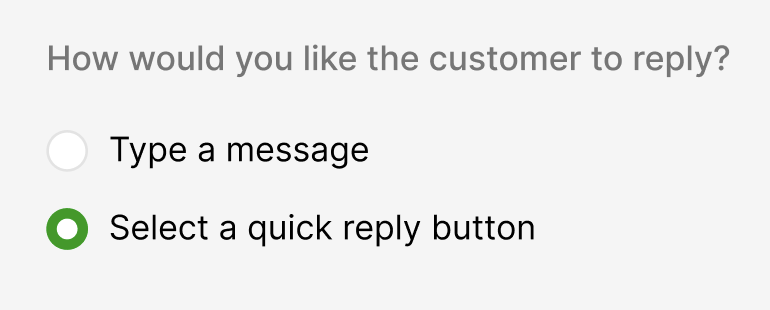
- If Type A Message is selected, Customers type a string of text to reply to the Third Message with a question like “How we can help?” The Customer’s reply is taken verbatim and is what the Agent sees when the Customer is routed.
- If Select a Quick Reply Button is selected, you can configure specific options, by way of buttons, as input to reply to the Third Message.
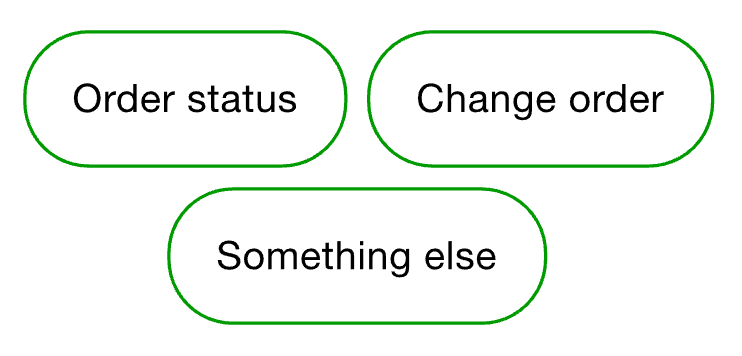
- Button Label – Enter the button label with text (e.g., Refunds) representing an option.
- Button ID – Used to identify the button via API or by an automation partner. It can be alphanumeric text, or numbers. We suggest using an ID that makes the button easily identifiable.
- + Add Button – Click to add more buttons as a Quick Reply.
- Fourth Message – You can activate/deactivate a message to let a Customer know you have the information you need to start helping them once their request is routed to an Agent upon typing a message or clicking a button. For example, “Got it! Someone will be with you shortly.”
- If the box is unchecked, no additional message is sent to the Customer after they reply to the Third Message and until the request is routed to an Agent and they send a response.
- If using Proactive Chat and Onboarding is activated for a Campaign, the Fourth Message may be redundant depending on how generic the Campaign’s greeting is.
Onboarding not activated (not recommended) #
- First Message – Enter a greeting. Something like “Thank you for contacting us. How can we help you?”
- This allows you to greet the Customer without asking for their name and email address in the beginning. Remember that you’ll still need a Customer’s email address to find their Profile in Gladly.
- How Would You Like the Customer to Reply? – Customers can reply to the Third Message by typing a message (Type A Message) or selecting a reply by clicking buttons (Quick Reply Button).
- If Type A Message is selected, Customers type a string of text to reply to the Third Message with a question like “How we can help?” The Customer’s reply is taken verbatim and is what the Agent sees when the Customer is routed.
- If Quick Reply Button is selected, you can configure specific options using buttons as input.

- Button Label – Enter the button label with text (e.g., Refunds) representing an option.
- Button ID – Used to identify the button via API or by an automation partner. It can be alphanumeric, text, or numbers. We suggest using an ID that makes the button easily identifiable.
- + Add Button – Add more buttons.
- Second Message – You can activate/deactivate a message to let a Customer know you have the information you need to start helping them once their request is routed to an Agent upon typing a message or clicking a button. For example, “Got it! Someone will be with you shortly.”
- If Onboarding is activated, you must enter a Second Message.
- If Onboarding is not activated, check/uncheck the Second Message. If selected, enter a message as a response to a reply from the First Message.
End chat #
- End Chat – Enter the text shown when the chat is ended.
- Chat Ended By Agent – Enter the text you want Customers to see when a chat ends.
- Chat Ended By Expiration – Enter the text you want Customers to see if a chat session times out because the Agent did not reply within 24 hours.
- Chat Ended By No Reply – Enter the text you want to use if a Customer stops responding.
- Chat Ended By a New Active Chat – Enter the text you want Customers to see if Glad App notices a duplicate chat session from the same Customer but on a different device/browser.
Hover text #
- Hover Text – Configure the hover text for specific areas of Glad App.
- Close Button Hover Text –Enter the text you want to use when Customers hover over the close icon.
- Send Button Hover Text – Enter the text you want to use when Customers hover over the send icon.
- Minimized Icon Button Hover Text – Enter the text you want to use when Customers hover over the Glad App icon.
- Attachment Icon Button Hover Text – Enter the text you want to use when Customers hover over the attachment icon.
Click Save, and you’ll be returned to the Glad App page. It can take up to five minutes for updates to appear.
Next, go to the Entry Points settings page and link Glad App to an Inbox. This allows you to direct chats from Glad App to a specific Inbox.
Link Glad App to an Inbox #
- On the Settings page, under the Orchestration category, click Entry Points.
- Hover over Chat and click the pencil icon to open the Chat Channel’s Entry Point settings.
- The Inbox selected in the default Inbox field is where all Glad App chats will be routed. You can stop here if this is the Inbox you want to use to receive chats from your website where Glad App is embedded. You can add an exception if you want chats to go to a different Inbox for a particular Glad App (if you have more than one).
- Click + Add exception if the Glad App won’t use the Chat Channel’s default Inbox or Entry Point SLA.
- Entry Point – Select the Entry Point you want to exclude from using Chat’s default Inbox. This will be the name of the Glad App you created for the mobile app.
- Inbox – Select the Inbox you want incoming chat requests from the mobile app to queue in instead of the default Inbox.
- Entry Point SLA (minutes) – Leave this field blank to use the selected Inbox’s SLA. Otherwise, entering an SLA here trumps the Inbox SLA.
- You can use fractional minutes. For example, 0.66 is 40 seconds.
- You can’t enter “0” or use the “-” (minus) symbol.
- Click Save.
Preview and embed Glad App #
When you’re done configuring Glad App, you can preview its appearance before embedding it on your website.
- From the Glad App page, find the Glad App you want to preview, click , then select View Preview.
- You’ll see what Glad App would look like on your website. Check the Desktop or Mobile option to preview Glad App in those formats.
- Preview Glad App with Proactive Chat – If you’re using Proactive Chat, check this box to preview what a Campaign would look like to a website visitor.
- If you’re happy with how you configured Glad App, click Embed this time to see the embed code.
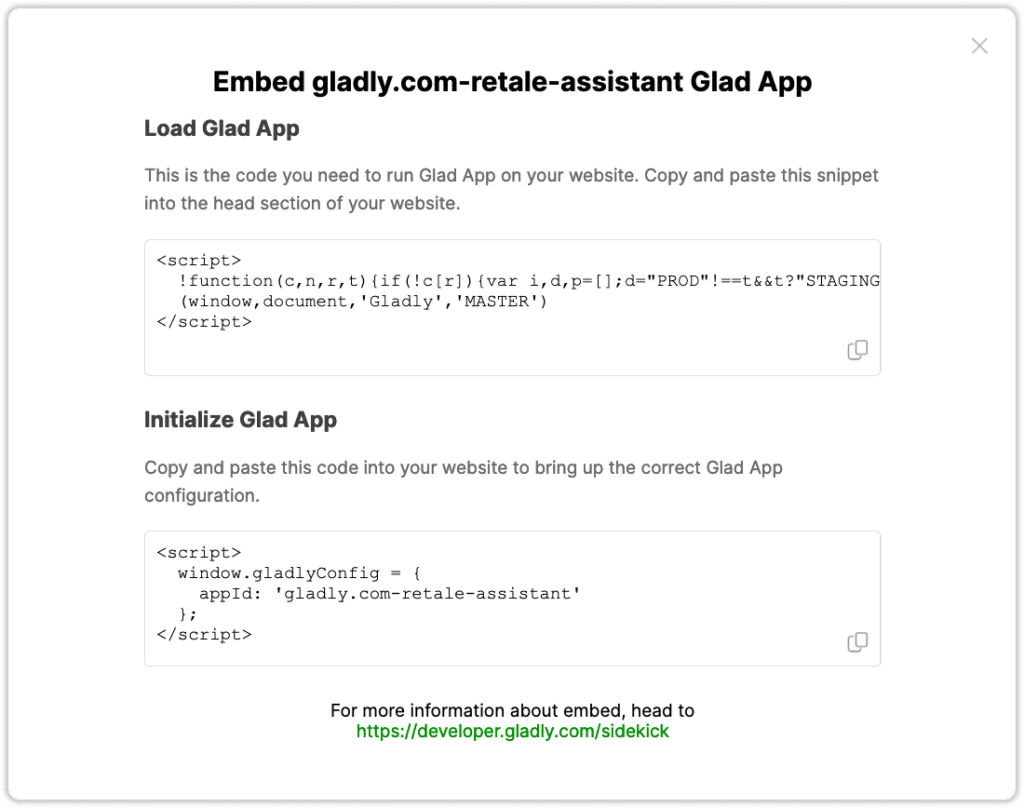
- You will see two snippets of code appear:
- Load Glad App – Copy and paste this snippet of code into the head of your website where you want to use Glad App.
- Initialize Glad App – Copy and paste this code on your website to bring up the correct Glad App configuration.
Apply Glad App updates #
Once Glad App is embedded on your website, you do not need to re-embed the Glad App code if you make additional changes to your Glad App configuration (e.g., colors, new text, placement, etc.). Any changes will take ~10 minutes to appear.
- 1Appears if Glad App If “Enable Search and Quick Actions” box is checked.
- 2Appears if “Enable Search and Quick Actions” is not checked.